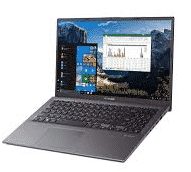
Jak wykonać zrzut ekranu na laptopie Asus? Screenshots– the most common and important word in today’s world. No matter which device you are using, knowing to take a screenshot is not your skill but a necessary thing to survive.

But the process of taking these shots varies from device to device.
W tym artykule, we will talk about how to take a screenshot on the Asus laptop.
It is not a tough nut to crack. Read it now and the very next time you will be teaching the same to others.
Screen capture is a new need of the hour, right? We can’t afford to miss it.
Zawartość
ASUS Laptops
Eight out of ten laptops run on a Microsoft system like Microsoft Windows 7, Okna 8, i Windowsa 10. Więc, taking a screenshot of these systems is an easy task.
To take a screen capture on Windows 10 i do góry, on-board tools offer this feature.

Jak wykonać zrzut ekranu na laptopie Asus?
The free tools like Greenshot and PicPick help to create screenshots. You can even take screenshots of one or more screens at a time, screen capture a particular window, and can edit it after the shot is taken.
1. On a single screen
When your laptop is not connected to any other secondary screens, the screenshot you take at that moment is what we call screenshot on a single screen. Follow these steps if that is the case…


- Tap on
Windows and PrintKeys on your keyboard. - Head to the
screenshotfolder under theimagefolder. There you will find the screenshot you just took. Found it? - If you press only the Print Button, the screenshot won’t be saved in this folder but will save itself in the clipboard.
- If you want to edit and save the screenshot as an image, open
Paint. Insert the screenshot pressingSTR + V.
2. On multiple screens
When you are using multiple screens at a time, go for the key combination Windows + Print. The screenshot of all connected screens gets created and the file is saved.
You can later paste it by pressing CTRL+V.
Like in the earlier case, you can insert the image in Paint or Adobe Photoshop or any other program to edit it.
In addition to this, you will find the screenshot in PNG format with ‘ C:\User \\Pictures‘ or ‘C:\User\Pictures\Screenshots‘
3. Screenshot of a particular window
There are times when you require the screenshot of a particular window. what to do then?
Have your screen content captured by just pressing [ALT+Print].
The picture is saved to the clipboard.
Remember that pressing only Print Key creates a screenshot for sure but it doesn’t create a file and no file is saved in the user directory.
Edit and Cut Screenshots
Look, it’s not that you need to edit every screenshot you take but there are times when you want this.
Without any further ado, let’s learn this skill too.
For editing, in-browser tools and add-ons are better to use. Jednakże, choosing the correct tool is quite important.
ASUS laptop users prefer using Google Chrome or Mozilla Firefox most of the time.
If you use Google Chrome, Awesome Screenshot Lub Fireshot is best for you.
If you prefer using the other popular browser that is Mozilla Firefox, opt for Awesome screenshot plus Lub FireShot.
Want more hot tech blogs? Stay tuned!
Keep Reading, Keep sharing!
Below is the comment box, don’t forget to add something.